I always wanted to make few posts dedicated to beginners who are just starting their journey in world of crafting and stamping .
It feels great to reach this level of crafting and now I can attempt to share what I have learnt till now . There are new products and new techniques coming up everyday and all of us should be aware & always ready to learn more and more.
I was introduced to stamps by a friend and I cud hardly understand how to go about it. Today collecting stamps and experimenting with them is my biggest passion.
I am glad to present few videos to you all where I talk about the basics of stamps.
I hope that this will be useful for you.
Feel free to contact me in case of any queries.
Hugs
Arjita
Disclaimer : This post is my version and information about the topic. There might be other categories of stamps in the market.
This project is very close to my heart as I made it for my daughters room. Both of us love pink and we always wanna be surrounded with this gorgeous colour .
I created a banner for her pin up board where she organises her school schedule and her other activities.
Step 1:
I started by cutting 5 thick Kraft coloured triangles and 5 different pion patterned paper triangles( which were a little smaller than the Kraft triangles) I love the pion papers because they r so pretty and girly.
Step 2:
I used clear bead gel and the beautiful tim holtz lace stencil to add some texutre on the triangles.
Step 3:
Next I stamped few Altenew vintage flowers and vintage roses with the help of my misti tool. Fussy cut them by hand.
I used the stampin up inks for these vibrant pretty blooms.I have a tiny video tute to introduce you to "Misti"
I wanted to use the super cute Julie Nutting wooden dolls for this project as my daughter loves them. I wanted to trim away the loop and it was easy with tonic scissors.
Step 5:
I used one of my spellbinders labels die to cut 5 pieces which i have placed at the base of my arrangement. There are lots of cute tags and elements in the pion stack and I trimmed and distressed them too.
Step 6:
I punched some pink paper with the STAMPIN up border punch & added at the top. I sticked a pearl string and a white lace trim to add interest.
Step 7:
Final arrangement of the banner . I layered few pion elements and tags over each other. Then I placed the roses and leaves. I sticked the doll and a cute mini metal charm. To add a little bling I used the mariane crystals here and there.
Finally i stringed all the five triangles through some seem binding and a cute banner was created .
Here are some close up shots :
My daughter absolutely loved it and will place it the way she wants.
I fell in love with the Altenew stamps at first sight😍. The stamps are so different and versatile . We can achieve various looks and styles with just one stamp. For today's post I have picked one of the most popular stamp sets called the "Persian motifs" and it's coordinating die set . Having the die set makes cutting the shapes hassle free but I must mention that the images can be easily fussy cut too.
The techniques are very popular and are created by few of my favorite card makers. I have attempted to take inspiration for them and here is my version ... I have created mini video tutorials for each of the techniques I have used , I have also uploaded them on the crafterscornerscreen youtube channel .
Hope u like the post for today and give these cool techniques a try.
This is the Persian motifs stamp set and the coordinating die
Card #1 White on Kraft
I stamped and Heat embossed the flowers and leaves at the top left corner of the Kraft card stock. I used the super fine detail white embossing power to emboss my images and sentiment.
Coloured the flowers and leaves by using water soluble pencil colours and few distress makers.
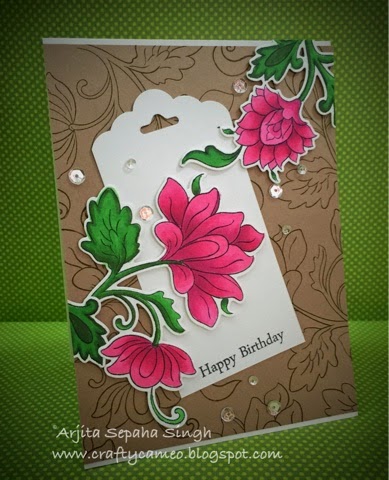
Card #2 Alcohol markers I created a background paper by randomly stamping the flowers on a light brown paper. Stamped the two flowers with memento tuxedo ink which is used when we wish to use copic markers .
I used two shades of green copics and stampin' blendability to colour all the images .
I then used the die set to cut the images and sticked them over a tag with some foam tape.
This is the most exotic of the cards and I love love love water colouring specially the no line look. All u need to do is stamp the images with a light archival ink and then put in all your efforts to achieve the best watercolour results. I used the new distress ink mermaid lagoon and black soot to make this gorgeous card.
I wanted a bright background for these delicate vellum flowers to pop. I sprayed few colours on a water coloured paper and blended it with water. Once the background was dry I flicked few water droplets to get the bleached/ bokeh effect. Then I sticked the flowers with some ranger Matt medium. Embossed a sentiment and the card was ready.
For the final card I embossed the flowers in vellum with gold embossing powder and coloured with the same shades of alcohol markers from the reverse side of the stamped image. This gives the card a glass painted look and it's so gorgeous in reality. I also die cut the word "hello" and embossed it with the same gold powder.
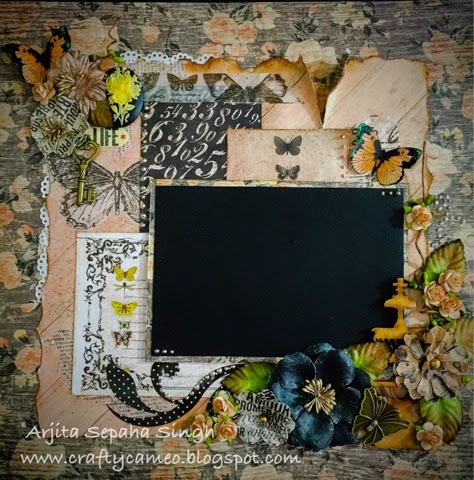
I made a scrapbook layout for a friend and she loved it...I will be sharing few pictures of the layout which has a vintage feminine touch because of the pearls and butterflies.
These days the stamping world is full of multi step stamps but those by Altenew are the most breathtaking ones. They make u feel happy and cheerful. The overwhelming compliments on your creations make u start feeling like an artist ;)
I got one of the most popular stamp sets by Altenew called Vintage Roses and just started stamping like crazy!! It's hard to believe that a Stamp can create such amazing results.
I decided to keep the cardbase simple and used two lawn fawn stitched dies for that.The roses were stamped and then I fussy cut them to stick on my card panel.
I directly stamped the leaves on the card and arranged my bouquet beautifully.
Here are few pictures :
I have a little video where you can see how I stamp the rose and get the idea about how easy it is.
Roses are my favourite flowers and I can not stop myself from buying a stamp with flowers and specially roses.
I picked a beautiful stamp set by Inspired by Stamping called "Elegant Flowers" this stamp has so many pretty roses and I water coloured the images to make my card.
I have a video which will explain all the steps I did to create this beautiful card.